Careful attention to technique at the time of vaginal hysterectomy is vital. Equally important is prior consideration of potential complications and the best ways to address them. Four trouble spots include:
- uterine tissue extraction (Although this is not a complication of vaginal hysterectomy, tissue extraction aids in debulking and removal of a large uterus.)
- protection of the ureters (It is important to palpate these structures before placing cardinal pedicle clamps, to protect ureteral integrity.)
- repair of inadvertent cystotomy
- control of bleeding in the setting of adnexectomy.
I focus on optimal approaches to these 4 scenarios in this article.
For a review of vaginal hysterectomy technique, see “Vaginal hysterectomy with basic instrumentation,” by Barbara S. Levy, MD, which appeared in the October 2015 issue of OBG Management. For salpingectomy and salpingo-oophorectomy technique, see my article entitled “Salpingectomy after vaginal hysterectomy: Technique, tips, and pearls,” which appeared in the November issue of this journal.
Both articles are available in the archive at obgmanagement.com and, like this one, are based on the AAGL-produced Online Master Class on Vaginal Hysterectomy, a Web-based program cosponsored by the American College of Obstetricians and Gynecologists and the Society of Gynecologic Surgeons. That program is available at https://www.aagl.org/vaghystwebinar/.
Manual morcellation to reduce uterine size and ease transvaginal removal is a useful technique to know. Five aspects of manual morcellation warrant emphasis:
1. Anterior and posterior entry into the cul-de-sacs is essential before attempting morcellation.
2. The blood supply on both sides of the uterus must be controlled.
3. During resection, take care to cut only tissue that can be visualized. Avoid resection beyond what you can easily see.
4. Once morcellation is completed, always go back and check the pedicles for hemostasis. During morcellation, these pedicles tend to get stretched, and bleeding may arise that wasn’t present originally.
5. Morcellation should be performed only after malignancy has been ruled out—it is a technique intended for benign uteri only.
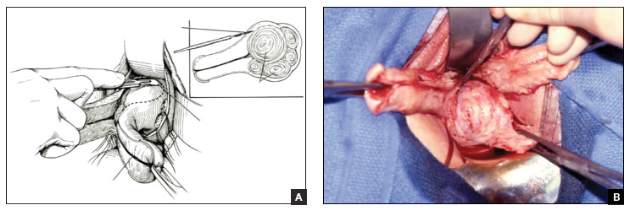
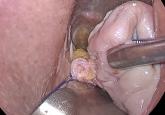
By bivalving the uterus it is possible to follow the endocervical canal up into the uterine cavity (FIGURE 1). Our technique at the Mayo Clinic is to place tenacula at the 3 and 9 o’clock positions prior to bivalving. A small amount of bleeding may occur because of collateral blood supply from the gonadal pedicles, but it should be minimal, as the uterine vessels have been secured.
| FIGURE 1 Bivalve the uterus |
To begin morcellation, split the uterus down the midline, with tenacula placed at the 3- and 9-o’clock positions, then follow the endocervical canal into the uterine cavity (A). Use a knife blade to take portions of myomas and other tissue to debulk the uterus (B). |
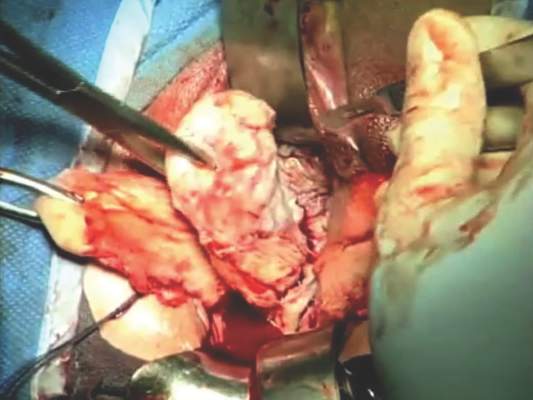
Proceed with morcellation once the uterus is bivalved. Use a Jacobs tenaculum to grasp the serosal portion of the uterus. Apply downward traction with your nondominant hand, and use the knife blade to resect portions of the uterus so that it can be debulked.
When a large myoma is encountered during morcellation, it often is possible to “finger-fracture” some of the filmy adhesions holding it in place, or to follow the pseudo-capsule of the fibroid in order to shell it out. In many cases, fibroids can be removed intact using these methods. If intact removal is not possible, debulk the fibroid by taking individual “bites.”
Tip. When the uterus is greatly enlarged, grasp it with a tenaculum so that it does not retract when you incise it. When large myomas are anticipated, keep an extra tenaculum on hand, as well as extra knife blades, as blades dull quickly when used to cut through calcified tissue. Continue to apply traction with your nondominant hand to allow each piece of tissue to be more readily developed (FIGURE 2).
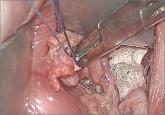
Tip. When managing the round-ligament complex on each side, stay between the round ligaments (your “goal posts”) to avoid getting too lateral. Keep the cervix intact for orientation purposes. Focus on diminishing the bulk of the uterus so that you can get around the utero-ovarian pedicles.
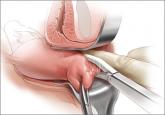
To control the utero-ovarian pedicle on the patient’s right side, place a finger underneath it, with traction applied. Place a Heaney clamp from the top down. Repeat this action on the patient’s left side, but place the Heaney clamp from the bottom up.
Manual morcellation of tissue is useful in small uteri that are tough to access, but the procedure is very helpful in large uteri in order to remove them transvaginally.